Table of Contents
Are you seeing burn marks in your chainsaw cuts?
Is your chainsaw leaving piles of sawdust instead of small chips of wood on the ground?
Is a dull chainsaw blade causing you to force your way through wood?
If either of those things is happening, it’s time to sharpen the chain.
But, “How do you sharpen a chainsaw blade”, you ask?
It’s much easier than you may think.
And with the right tools, you can get your chainsaw chain as sharp—or sharper—as the day you bought it.
So, let’s dive in.
I’ll explain how to sharpen a chainsaw chain in detail while guiding you every step of the way.
Chainsaw Buying Guide
Before we jump into the chainsaw sharpening process, I wanted to let you know about my chainsaw buying guides.
If you’re ever in the market for a new chainsaw, these free guides can help.
For many people, they find a 16 inch chainsaw to be the most versatile tool to own. If that’s the case for you, check out my best 16 inch chainsaw reviews. It includes the top chainsaws of this length in every type: gas, battery, and corded electric.
On the other, if you’re looking for the lightest chainsaws, I have a review guide on that as well.
And finally, if you’re looking to save the most money on a new chainsaw, you may find my guide on the best cheap chainsaws to be a bit more practical for your needs.
How Often Should You Sharpen a Chainsaw?
This is the most common question people have about chainsaw chains.
But the answer is simple.
Sharpen the chainsaw chain whenever it becomes blunt.
You know it’s blunt when you have to put pressure on the blade to make it through a cut.
You also know it’s blunt when the chain produces fine sawdust and not chips of wood while cutting.
Black and burned wood is another indicator of a dull chainsaw chain.
If you experience any of those symptoms, it’s time to sharpen your chainsaw.
When Should You Replace the Chainsaw Chain?
Chainsaw chains don’t last forever, no matter how much you may sharpen them.
A good rule of thumb here is to replace the chainsaw chain when the longest portion of the cutting tooth is less than 4 millimeters or if you find cracks.
For the average chain that hasn’t been severely damaged by rocks or dirt, this usually equals about 10 re-sharpenings before it’s time for a replacement.
How to Sharpen a Chainsaw Chain
There are three ways to sharpen a chainsaw:
- By hand with a file sharpener
- By hand with a power Dremel
- With a bench-top sharpening tool
I’ll explain how to use each method below.
You can find the best chainsaw sharpeners here that include all three types.
Using a File Sharpener
Hand filing a chainsaw chain may seem brutal, but it’s one of the most popular—and cheapest—ways to go.
Plus, once you get the hang of it, file sharpening can actually go surprisingly fast.
So, don’t disregard it until you try it—at least once.
These are the tools you’ll need:
- Round file
- Flat file
- File guide
- Depth gauge
- Protective eyewear
- Gloves
Note: Always remove the power from your chainsaw before attempting the filing process. For gas chainsaws, remove the spark plug connector from the spark plug. For battery chainsaws, remove the battery. And for corded electric chainsaws, unplug the power cord.
Also, engage the chain brake.
Step 1: Determine the Diameter and Pitch
Before you start the sharpening process, you need to know two chain specifications: the diameter of the cutting edges and the pitch of those angles.
You can find this information in your chainsaw owner’s manual or the package that the chain came in.
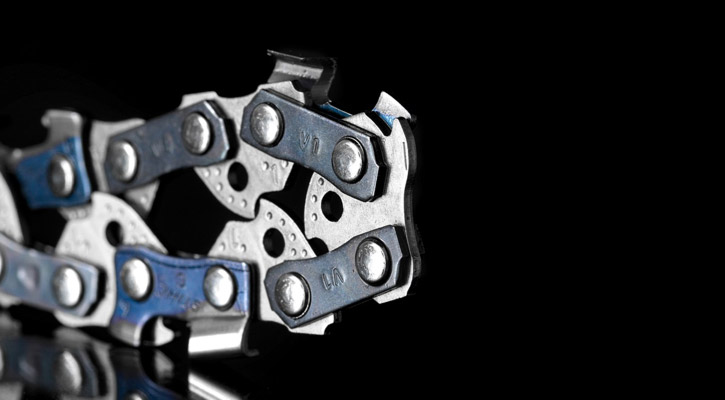
Chainsaw chains have a number of teeth with semicircular cutting edges. Sometimes these are also referred to as “cutters”.
The diameter of the cutting edges varies from one chain to the next, but they’re typically 5/32 inch, 3/16 inch, or 7/32 inch.
To properly sharpen the curved cutting edges on your chain, you need to use a round file that has the matching diameter.
In addition to each tooth (or cutter), there’s a “depth gauge” that looks like the shape of a shark fin in front of each cutting edge. The tip of this depth gauge is slightly shorter than the tip of the cutter and its purpose is to limit the depth of the cut.
After repeated sharpenings, the depth gauge will eventually become the same height as the cutters. When that happens, you can file down the depth gauge with a flat file.
You’ll also notice that the tops of the cutters are at alternating angles. One tooth angles left and the next angles right. This design is so your chainsaw doesn’t pull to one side while cutting.
Step 2: Mount the Chain in a File Guide
To ensure that ever cutting edge is sharpened at the same angle, you need to use a file guide.
The file guide rests on the surface of the chain and controls the angle and depth of the filing process.
If you have a vise, it can make things much easier by clamping the chainsaw blade into the vise. That way the machine stays in one place while you use the file guide.
Take a marker and mark the first tooth that you’re going to sharpen. That way you’ll know when you’ve finished sharpening all of the cutters on the chain.
Place the file guide on the top of the chain.
Adjust the angle of the guide until the indicator lines are parallel with the blade.
Step 3: Sharpen the First Cutter
While keeping that angle steady, push the file forward and away from you across the chain tooth.
Repeat the filing process by only pushing the file in one direction and keep track of the number of passes you make. You’ll need that number for sharpening the other teeth.
When the cutter is properly sharpened cutting edge should be shiny.
After you’re done sharpening the first tooth, skip the next cutter and file the one after it. The cutters alternate back and forth with the angled of direction with every tooth, so to speed up the process of filing it’s best to sharpen all of the ones that have the same angle first.
When sharpening other teeth, use the same number of strokes as you counted with the first tooth. That way, each cutter is sharpened the same amount.
Once you sharpen all of the teeth in one direction, rotate the file guide so that it’s the proper angle for the other cutters. Then, repeat the filing process until you’re done with those teeth.
Using a Power Dremel
A handheld power Dremel makes the process of hand filing go much quicker.
You can buy a chainsaw sharpening kit that is specifically for a Dremel which includes a cylindrical grinding stone and an alignment guide that clamps onto the tool.
The process is practically the same as hand filing except the Dremel does all of the sharpening work.
Instead of pushing the file back and forth, the Dremel will spin and grind the chainsaw chain cutters until they’re sharp.
To maintain a consistent level of sharpening for each tooth, count the seconds it takes to sharpen the first cutter. Then use that same estimate of time to sharpen the other teeth on the chain.
Using a Bench-Top Sharpener
This type of chainsaw sharpener offers the most accurate and consistent results. It’s also the easiest and fastest way to sharpen a chainsaw chain.
It looks similar to a miter saw, but instead of using a saw blade, a bench-top sharpener has a grinding wheel.
Step 1: Clamp the Tool to Your Workbench
A bench-top sharpener needs to be mounted to a surface.
The easiest place to do this is on a workbench.
Clamp or screw the sharpener onto the surface.
Step 2: Place the Chain into the Sharpener’s Vice
The benchtop sharpener has a vice that you can secure the chain in. This vice keeps the chain at a set angle so it won’t move on you while sharpening.
Step 3: Adjust the Angle
Adjust the angle of the vice until it’s correctly positioned for your chainsaw’s chain.
Step 4: Sharpen the Chain
Squeeze the trigger on the power tool and then lower the grinder until it makes contact with the chain tooth.
Count two to three seconds.
Pull the grinder back up so it stops sharpening the chain.
Release the chain clamp, move up the next cutter that’s angled in the same direction, and repeat to process. Remember, chainsaw teeth alternate back and forth with every tooth. So, sharpen every third tooth until you get back to the beginning. Then readjust the angle of the vice to be in the opposite direction and sharpen the rest of the teeth.
Enjoy Your Sharpened Chainsaw
So, how do you sharpen a chainsaw blade?
Well, now you have three options.
Regardless of which technique you use, the end result is the same: a sharp chainsaw chain that can cut better, faster, and more safely.
Just remember that you can’t sharpen a chainsaw indefinitely. Eventually, the metal will get grinded down so much that the chain is not useful anymore.
The trick for how to sharpen a chainsaw chain and when to stop is about 10 sharpening sessions. Once you hit this point, it’s time to replace the chain.
As a reminder too, if you’re interested in upgrading your chainsaw at any point, you may want to check out my other free chainsaw guides.
Also, if you’re in the market for the best hedgetrimmer, check out this great comprehesive
If 16 inch chainsaws are you favorite, take a look at my best 16 inch chainsaw reviews. If you’re in the market for a small chainsaw, check out my guide on the lightest chainsaws.
Also, if you want to save the most money on a new chainsaw, you’ll want to see what’s available on the best cheap chainsaws page.
On an end note, for those in the market for hedge trimmers, check out this great guide to help choose the best one for you: Best Hedge Trimmer
Happy sawing!

Your pal,
Chainsaw Larry

