Table of Contents
Do you need to cut tree branches or limbs that you can’t reach from the ground?
If so, then a pole saw is the best tool for the job
However, there’s not a lot of helpful articles out there on how to use a pole saw.
So, I put together this step-by-step to give you the top tips and advice on the best way to use a pole saw for your trimming and pruning needs.
Read on to find out how to use this tool efficiently and safely.
And, if you’re in the market for a pole saw, take a look at my best pole saw reviews page.
How to Use a Pole Saw
1. Clear the Work Area
The area where you’ll be standing to remove tree branches or limbs should be clear of people and property that could get damaged.
You also want to make sure there are no trip hazards around, as you need to be able to move freely and easily while you work.
If you’re working in a public space, you might also consider roping off the area to keep others from getting too close.
2. Plan Where You Need to Cut
Before you put your pole saw to the wood, plan out where you’re going to make your cuts.
You don’t want to just start cutting branches or limbs without first thinking through the process.
So, take a step back, examine the entire tree, and consider all of the branches you want to cut off.
Once you’ve decided how much work is involved, then you can move on to the next step.
3. Cut the Lower Branches First
When planning your cuts, you need to figure out how you’re going to access the highest branches that need to be removed.
More often than not, this means getting rid of the lower limbs first.
Removing the limbs that are lower on the tree will ensure that you have a clear path to make smooth and safe cuts in the higher branches you want to remove.
So, make a plan to cut the lower branches or limbs off of the tree first. Then work your way up to the higher pieces of wood.
4. Position Yourself Correctly
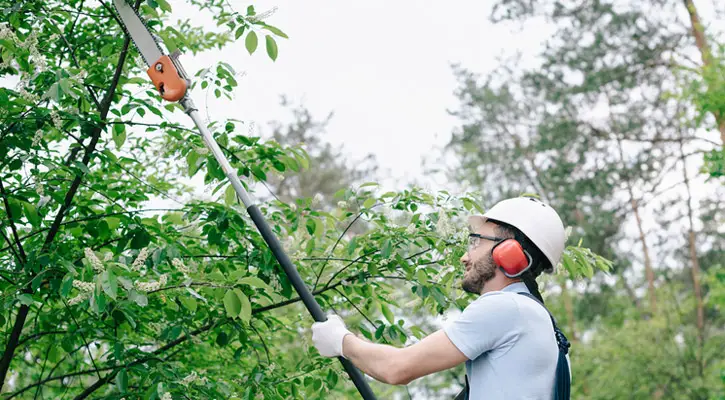
The correct position for using a pole saw is to stand off to the side of the branch, not directly below it.
This position will reduce your chances of injury when the wood falls out of the tree.
Make sure you can hold the end of your pole saw at chest level too. You want the pole saw to be at an angle while you cut.
So, you may need to adjust the pole saw to ensure it’s the right length, which I’ll cover in the next step.
5. Adjust the Pole Saw Length
After you have gotten yourself into the right position and before you start cutting, this is the best time to adjust your pole saw to the right height.
Consult the owner’s manual to determine how you adjust the length of your saw.
Then, stretch the pole saw out so that the blade of the saw can reach the lowest branch while you’re holding the pole at chest-height level.
6. Position the Pole Saw Blade
Using both hands, move your pole saw to the branch you need to cut.
Stop there for a moment and make sure you have control over the weight of the pole saw.
Once you feel comfortable and in control, move the pole saw blade so that it’s resting on the weight of the branch.
But don’t start cutting just yet.
7. Starting the Cut
Your first cutting strokes should be slow and controlled.
Cutting a branch at full speed right off the gate can result in the blade slipping around and making the cutting process harder.
So, it’s a good idea to create a groove in the wood.
Cutting limbs is different. They’re so thin that you can just cut them quickly.
To create a groove in a branch, you’ll want to cut very slowly at first. Tapping the throttle with your finger or pushing it in lightly can help make the initial groove in the wood.
This groove will help guide you for the faster strokes you’ll make later.
While making these first cuts, make sure to anticipate that the saw can slip sideways, especially if the branch is sloped.
If and when the pole saw slips, stop cutting and reposition the blade before continuing to cut.
8. Finishing the Cut
Once you’ve created a groove and your saw is secure, you can then increase your stroke speed.
As your cuts bite deeper, keep an eye on the branch.
You may be standing off to the side, but it can still fall in unpredictable ways.
Make sure you can move out of the way if necessary to prevent an injury.
9. Clean Up the Work Area
After the branch has fallen to the ground, it’s a good idea to move it out of the way before making your next cut.
You don’t want to trip as you reposition yourself around the tree to remove other branches and limbs.
10. Prepare for the Next Cut
Once you’ve removed the first branch, then you need to get into position for the next cut.
Remember to cut all of the lower branches first, then move on to the ones that are higher up.
Just like before, you want to make sure that you’re standing off to the side of the branch you need to cut.
Position your pole saw so that the end of the pole is at chest height and the blade reaches the branch.
Next, position the saw blade vertically against the branch so it’s in the cutting position.
Once your blade is in place, you’ll then make your groove cut.
After the groove cut is made, you can increase your sawing speed until you cut through the wood.
After the branch hits the ground, move it out of your way.
Continue these steps until all of the branches that need to be removed have been done so.
Pole Saw Safety Tips
When it comes to how to use a pole saw, you should always be focused on safety.
Here’s how to be as safe as possible while using your pole saw:
- Wear the right chainsaw protective gear, including a helmet or hard hat, gloves, eye protection, boots, and snug-fitting clothes
- Make sure the chain has been properly oiled before each cut.
- Only cut during the day when it’s easier to see.
- Don’t use your pole saw in rainy or wet conditions, especially if you have an electric pole saw.
- Cut one branch at a time. Never try to cut to branches in the same pass.
- Removing the fallen branch before starting on the next branch.
- If a limb or branch is under tension, be aware of spring back. This occurs during the cut when you release that tension and the wood can snap back in unpredictable ways. If a branch is under severe tension, consider performing an undercut first that’s about halfway through the wood. Then cut from the top. This method can reduce the spring back force.
- While cutting with a pole chainsaw, be ready for a kickback. Kickback occurs when the blade tip nicks a hard object or the chain gets pinched. These incidents can send the pole saw blade flying backward. So, make sure you have good control over the tool when using it.
- If the branches are thicker than 8 inches, you need to call a professional.
- Never try to remove branches or limbs that are near or above power lines. Call a professional for this type of removal.
Closing Thoughts on Using a Pole Saw
As you learned, pole saws are not that hard of a tool to use.
However, you do need to take a few precautions in order to use a pole saw safely and efficiently.
Like with anything you do for the first time, using a pole saw may be a bit difficult at the beginning.
But after you get used to the how the tool works, and understand what it takes to keep the chainsaw head positioned well at the end of a pole, you’ll be able to cut branches and limbs much more quickly.
One additional thing to keep in minds is to never use a pole saw for cutting down trees or cutting up firewood.
For those tasks, you’ll want to use a standard chainsaw.
If you don’t have a chainsaw, or you’re looking to upgrade an existing power tool, check out my top chainsaw reviews.
That page includes the best 10 chainsaws of every type for you to consider.
I hope you enjoyed this step-by-step guide on how to use a pole saw.
Happy sawing!

Your pal,
Chainsaw Larry

